People have been wondering about how I created my themed terminal setups, so I thought I’d make a post about it.
I’ve also found an approach in all this to source control my dotfiles, which I’ll dig into in this post.
I have themed terminal setups for both macOS and Windows, so I’ve got repos with dotfiles and approaches for both. (This setup is also possible to do on Linux / WSL, just haven’t gotten around to it.)
Inspiration
First off, credit where credit is due: Scott Hanselman has a number of posts about this which I recommend checking out, as they were the original inspiration for my terminal setups.
If you’re interested in getting a similarly themed setup, read on…
Package Managers
I use package managers for everything – Chocolatey on Windows and Homebrew on macOS. (I’ll probably get into winget at some point, just not yet.)
I also use PowerShellGet for PowerShell modules and recommend getting the latest version of that installed in your PowerShell environment.
The rest of this post assumes you’re knowledgeable with these package managers and able to get them installed.
Source Controlling Dotfiles
I found an approach for source controlling dotfiles in my home directory with git – the trick is to do a .gitignore
file that ignores everything by default and selectively un-ignoring files under certain paths.
Turning your home directory into a git repo itself is a bit convoluted to get going at first, but once I figured it out, I was very happy with it, since I could update my dotfiles and commit changes to them and push them up right away.
Because my dotfiles can and do change frequently, I won’t go into exhaustive detail here on them, but instead point to the repos where I have them. The root of these repos represents the root of my home directory on the respective platform.
My dotfiles for macOS are here.
My dotfiles for Windows are here.
A few things I want to note about these dotfiles:
- On macOS, I’ve got dotfiles for PowerShell (pwsh), zsh, and bash. I’m most familiar with PowerShell so the most robust setup is there, and it is my default shell on mac. If you have notes about how to make my zsh and bash setups better, send me a message, but I’ve tried to replicate a lot of the auto-complete/history setups there similar to what I have in PowerShell, but I consider PowerShell to be the best setup I’ve been able to get, so much of the focus of this post is around that.
- On Windows, it’s a bit of an insane story with the number of places that PowerShell profiles can be when you’re using
OneDrive personal and/or OneDrive for Business (since PowerShell looks for the profile in the Documents directory and
adding OneDrive to the mix likely moves where that directory is), so in order to accommodate whatever Windows machine
I’m on, I’ve put my PowerShell profile in the standard location for PowerShell 7+, and simply dot-source that profile
from all the other potential profile locations. This also results in a really insane
.gitignorefile on that platform, but it is what it is.
Note that if you’re trying to follow this setup, the presence of these dotfiles will try to load things that don’t exist yet if you haven’t installed the right packages, so follow along next for that. Speaking of which…
Dev Machine Setup Scripts
I highly recommend you get into the practice of maintaining a dev machine setup script which installs all the tools you need to be productive on a given machine. This is something I’ve been doing personally for years and it makes getting set up on new machines a breeze, to the point where I basically just run it, and then pull down my dotfiles to my home directory, then I’m done.
Oh and, just take notes on your setups, too – there’s things that inevitably can’t be scripted that you’ll want to customize on a new machine, and you’ll thank yourself later when you have those notes.
macOS
I recently got a new mac and therefore have been spending a lot of time on that side of the house fine-tuning things, so I’ll start there.
1. Practice in a macOS VM
If you have Parallels or some other type of VM tool, you may want to practice this setup there to not disturb your host machine until you know you have something you like. You can run a guest macOS VM on macs, so that’s handy.
2. Get PowerShell
I use PowerShell everywhere, even on macOS. You may be fine with just zsh, and that’s ok. If you want to use PowerShell, install it via Homebrew.
I go a radical step further on macOS and set this as my default shell. I’ve also seen people set PowerShell as their default shell on Linux as their daily driver on a physical workstation, and they are living their best life.
3. iTerm2
First off, on mac, get yourself a better terminal. I use iTerm2 which can be installed with Homebrew.
4. Nerd Fonts for macOS
Next, install some Nerd Fonts – you’ll need these for special icons in your prompt. I use Cascadia Code (which, for reasons I’ll spare, has a different name for the actual font name). If you wish you can install all the different Nerd Fonts with a helper script like this, or just install the one you want.
Note that, as of Nerd Fonts 3, you’ll find a number of icons have moved in terms of their names, so I customized the Oh My Posh theme (more on that in a second) to fix a number of things there based on one of the default themes. I can’t say I’ve hit 100% of the icons I might run into, but I’ve at least fixed what I’ve found so far through using it for a while.
Once you have your preferred font installed, change iTerm2 to use it under Settings > Profiles > Text.
5. Oh My Posh for macOS
Oh My Posh is an amazing prompt theming engine for any shell. It started as a theming engine for PowerShell, then grew from there. I’ve found it to be better than Oh My Zsh, Oh My Bash, and Oh My Fish, for all the shells I use, and I love that it is a one-stop-shop solution versus trying to theme individual shells. (I stopped trying to set up Fish a while back since between zsh, bash, and PowerShell, I have enough shells.) Update: I set up oh-my-posh with Fish, too.
Install Oh My Posh via Homebrew.
I have my theme JSON file for Oh My Posh at a standard location in my home directory, and it’s the same theme file for both macOS and Windows.
6. Extra: Terminal-Icons for macOS
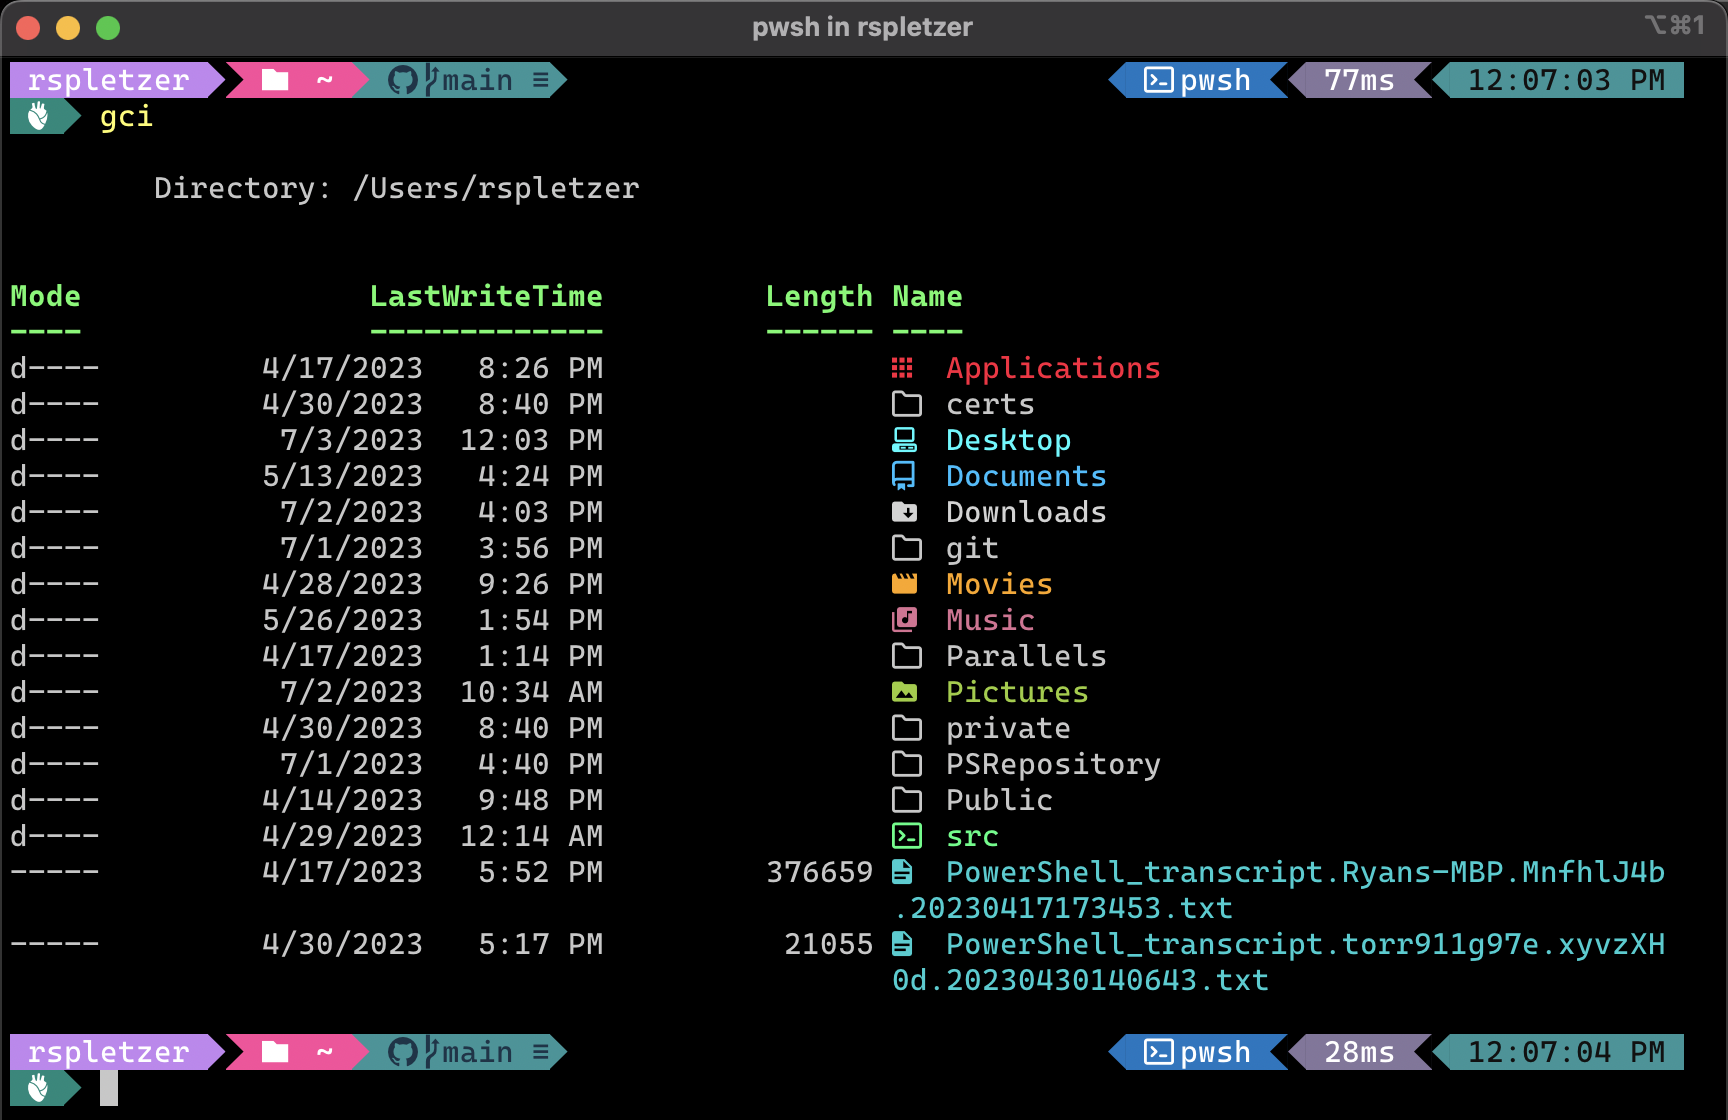
This applies only to PowerShell: there’s a great module called Terminal-Icons which you can install from the PowerShell Gallery, and doing so will give you some nice icons when listing items in the current directory.
Note that to see this on macOS you have to run Get-ChildItem (or its shorthand alias, gci), since your regular ls
call on that platform uses the native binary. (On Windows with PowerShell running ls will show the icons, since in
that shell on Windows ls is an alias for the Get-ChildItem cmdlet.)
7. PSReadline and Other Interactive Prompt Helpers for zsh, bash
If you’re using PowerShell, you’ll want to get the latest PSReadline and add some things to your profile to get predictive autocomplete from history in a list view. (Once you have this installed, see the profile in the repos above for how to turn this on.)
I have similar setups for zsh and bash via these Homebrew packages below, though in playing around I may have turned
some of them off by commenting them out of the rc dotfiles. Try installing these and taking a look at my .zshrc and
.bashrc and related files in the macOS repo above to get an idea of the current setup for these. Oh also you’ll want
to get the latest bash from Homebrew, because the built-in bash in macOS is old and won’t handle most things. (Though
these days I don’t use bash much on macOS, just pwsh and zsh.) I’m open to feedback on how to make these zsh and bash
setups better since I’m not a deep expert in this area, so if you think this can be improved, send me a message.
bash-completion@2
bash-git-prompt
fzf
zsh-autocomplete
zsh-autosuggestions
zsh-history-substring-search
zsh-syntax-highlighting
8. Put Dotfiles in Place for macOS
The last step is to put your dotfiles in place. I have example .zshrc, .bashrc, and PowerShell profile files in the
repos linked above, as well as the Oh My Posh JSON theme files.
Windows
Windows is largely the same approach to set up as macOS above.
1. Practice in a Windows VM
You can practice this in a Windows VM, either with Hyper-V or with the Windows Sandbox feature.
2. PowerShell
Windows PowerShell 5.1 is built into Windows itself, but if you want the latest and greatest features you’ll want to go grab the latest PowerShell, ideally by installing it via Chocolatey.
3. Windows Terminal
Windows Terminal is already the default terminal on the latest Windows 11 builds, but if you’re not on one of those builds or are on Windows 10, you’ll have to go get this from the app store.
4. Nerd Fonts for Windows
Install your preferred Nerd Font via Chocolatey – I like Cascadia Code.
Once installed, set it as your font in Windows Terminal.
5. Oh My Posh for Windows
Install Oh My Posh via Chocolatey.
I have my theme JSON file for Oh My Posh at a standard location in my home directory, and it’s the same theme file for both macOS and Windows.
6. Extra: Terminal-Icons for Windows
These steps are largely the same as macOS (see above). Get Terminal-Icons and add the necessary lines to your profile (example in repos above).
Note that on Windows the ls command in PowerShell is an alias for Get-ChildItem, so running that will show you all
the fancy icons when listing items in a directory. Same thing for dir.
7. PSReadline Interactive Prompt Helpers
This is largely the same as for macOS above. Install the latest PSReadline module in PowerShell.
8. Put Dotfiles in Place for Windows
The last step is to put your dotfiles in place. I have example PowerShell profile files in the repos linked above, as well as the Oh My Posh JSON theme files.